In the spring of 2009, I “married” my husband three times! First we filed the legal paperwork to be married (it’s a very cut and dry ordeal in S. Korea), then we had a traditional Korean wedding ceremony, and lastly, we had a wedding reception in California. This series is dedicated to the last event, which was truly my DIY masterpiece. Nearly every aspect of our travel-themed wedding was a DIY project that I poured my heart into. I hope you enjoy this series of DIY wedding projects!
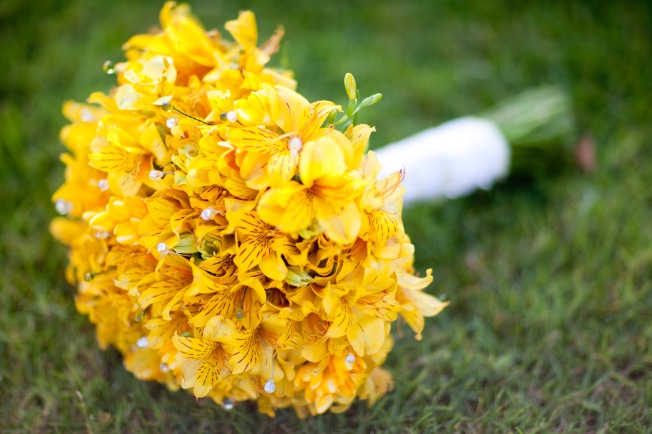
Today’s project: Alstroemeria Wedding Bouquet
A running theme in all of my DIY wedding posts relating to flowers is this: KEEP IT SIMPLE! There is no sense in attempting DIY wedding flowers if you’re going to try to be a professional florist overnight–I’m certain your sanity will suffer otherwise! And as a DIY crafty bride, there are going to be a million other things to worry about.
The most significant way I’ve been able to keep my projects simple is by choosing a single flower (yellow alstroemeria) for all of my floral needs. Alstroemeria (a.k.a. Peruvian lily) is not only great because of its subtle stripes (which add extra visual interest on their own), but a single stem will usually have several blossoms, which makes it affordable and easier to handle (since you can have fewer stems).
The great thing about using only one flower type/color is that you only need to focus on constructing a nice round shape instead of worrying about the overall composition of your bouquet and how the different flowers and colors are working together. However, I’ll admit that I did include a few stems of yellow freesia in this bouquet. I chose yellow on purpose so it would blend in and keep me from having any flower arranging headaches (remember, keep it simple!). But now you may be wondering, “Why include it at all?” Well, the freesia was just for me: alstroemeria is not a fragrant flower, and I wanted my bouquet to smell nice since I’d be holding it for the better part of the day!
I referred to this website as a guide for how to construct my bouquet. Basically, you start with two stems to serve as your base, and then you slowly build from there by adding flowers around this anchor. It’s a good idea to occasionally wrap your stems in floral tape to secure your arrangement and keep the flowers from shifting around.
Once I finished with the flowers, I added my decorative beads on wire, and then wrapped the middle of the bouquet stems in floral tape. Next, I wrapped the bouquet stems with pretty ribbon and used corsage pins to keep it in place.
Lastly, I sprayed my bouquet with Floralife finishing touch spray to keep my bouquet well preserved, and stored my bouquet in a vase with a little bit of water to keep the flowers well hydrated until the following day. Tada!


Reblogged this on mz jenny lee.